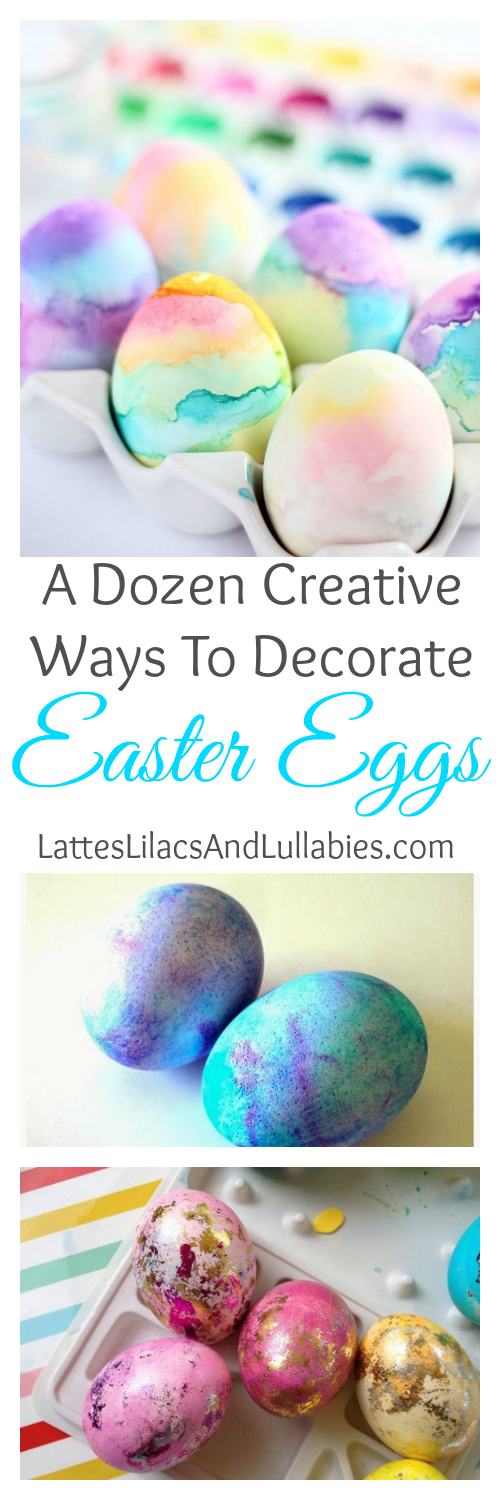
Every spring we decorate Easter Eggs with our nieces and nephew. Sometimes, we do other Easter activities, like bake spring-y cupcakes or have a glow-in-the-dark Easter egg hunt. They look forward to this tradition every year, and so do we. I am always on the hunt for new creative ways to decorate Easter eggs, and I’ve found a dozen (pun intended) easy and fun ideas from fellow amazing bloggers on Pinterest.
I hope you enjoy this collection of pretty eggs and fun inspiring ideas, that are sure to make your Easter extra special this year.
{This post contains affiliate links to some amazing products that will help you create these gorgeous Easter eggs. If you click on a link and decide to purchase, I will make a profit because I am a business affiliate with Amazon. To read my Disclosure Policy click here, and Happy Easter!}
I love having family traditions. I talk a lot about that in this post. I know that spending the time and money on projects and activities with kids can seem daunting and overwhelming. We’ve had those days where we wondered if all the headache was worth it.
And, then they start to grow up, and let me tell you….they remember. Our nieces and nephews are getting older now…going to be 8, 9, & 11 this year. Heart be still. But, they still ask when they’re going to come over to decorate Easter eggs, or carve pumpkins, or make gingerbread houses. It’s precious.
So, if you are in the midst of motherhood, and wonder if keeping these traditions alive is even worth it….yes! YES! It is worth it. These are the things that they remember about childhood. Cherish these time, no matter how chaotic. They will be gone in an instant.

Today I’d love to share with you 12 Creative Ways to Decorate Easter Eggs. Thanks in advance to these amazing bloggers who shared these ideas with the Pinterest world. Links below included if you’d like to visit these blogs for instructions….
Let’s get cracking!
{No…really don’t get cracking! That would be a no no in the world of Easter eggs! }
DIY Dyed Robin Eggs
Not only are these Robin Eggs from Honestly Yum beautiful, but robins just so happen to be our state bird here in Michigan. These eggs are also dyed using completely natural ingredients. Erica from Honestly Yum uses red cabbage to create the gorgeous ombre hues of robin egg blue….yes, you read that right…red cabbage. And, then uses a thick bristled brush to create flecks of gold on the eggs using edible gold paint. These eggs are way to gorgeous to eat, though, if you ask me.
Watercolor Eggs
This technique for decorating Easter eggs is so easy and mess free. Every moms dream, right? Tan from Squirrelly Minds created these gorgeous eggs using just water, a paint brush, and watercolor paints. What a quick and easy way to celebrate Easter. Plus, there will be no multicolored fingertips on Easter morning because these non-toxic watercolor paints wash right off little hands.
Glitter Eggs
I love anything and everything glittery and sparkly, and so do my nieces. So, when I saw this tutorial for Glitter Eggs by Linda at Craftaholics Anonymous {love that blog name!}, I knew I had to try these. She suggests using paper mache eggs, so that you can keep them forever and forever. But, you could certainly make these glitter eggs with hardboiled eggs, as long as you do not plan to eat them afterwards.
The tutorial walks you through painting your eggs in a coordinating color as your glitter. Check out these paints made from fruits and vegetables…perfectly safe for little hands.

Then, coat your egg in glue, add your glitter
to separate paper cups, and drop your painted sticky eggs in the glitter
filled cups. A quick toss, and you’re done.
Seems pretty easy, right? This multistep process may be difficult to do with little ones. But, if you complete it throughout the day, and break it up with different Easter activities, movies, baking, etc, I think they’d stay interested. If not, mom gets to have a private glittery craft time after the kids are in bed.
Glow-In-The-Dark Eggs
As I mentioned earlier, a glow-in-the-dark Easter egg hunt is one of my nieces and nephews favorite activities every year. We take plastic Easter eggs, and fill them with glow necklaces. We place them all over the house, close the blinds & shut off the lights, and they go nuts.
I can’t even imagine how crazy they’d be about these Glow-In-The-Dark Easter Eggs. I’ve visited the blog, Growing A Jeweled Rose many times before, for great ideas on crafting & play for the kids. And, this post is one of my favorites.
To make these spectacular glowing eggs, first spread shaving cream in a dish, deep enough to cover the eggs. {Have you ever tried dying eggs in shaving cream before? More about this technique later in this post!}
Then add Neon Paint {this kind
is non-toxic & washable} or Glow Paint
to the shaving cream, and swirl together using a plastic spoon.
{Note: if you use Neon Paint, you will also need a Black Light
to see the glowing effect. These eggs are more amazing under Black Light
anyways, and you can purchase one here
for under $20!}
Place the hardboiled eggs in the shaving cream & glowing/neon paint mixture. Let the eggs sit on one side for 10 minutes & then turn over and let sit on the other side for another 10 minutes.
Remove the eggs from the shaving cream using a plastic spoon, and place them on their own paper towel.
Gently wrap the paper towel around the egg, and squeeze excess moisture out. Let dry & enjoy!
This process seems so easy and fun. I think kids would absolutely love this. Visit Growing A Jeweled Rose for more family crafts & activities. And if you’re looking for more Glow-In-The-Dark fun, check out this post filled with awesome ideas. These Glow-In-The-Dark Easter eggs will definitely be added to our to-do list this Easter.

Melted Crayon Easter Eggs
I love melted crayon crafts {check out our Melted Crayon Ornaments we made this year!}. I never thought to use the natural heat from freshly hardboiled eggs to create swirly melted crayon designs…but Jenna from Jenna Burger Designs did.
This process involves handling hot eggs, which is what causes the crayons to melt and make these gorgeous eggs. However, that may not be the easiest task with small children.
Jenna suggests placing the eggs back in the egg carton, or another stable surface, and coloring on one side at a time. She combined colors, smudged the colors together to create a background color, and then drew scribbles incorporating even more color to these Easter eggs.
So fun….

Frozen Inspired Easter Eggs
My youngest niece, Brianna, love LOVES…I mean L*O*V*E*S Frozen! I think she could recite the movie from start to finish. She likes Ana, but of course like every other little girl, she loves Elsa! I think she would just about flip over these Frozen Inspired Easter eggs by A Pumpkin And A Princess.
Crystal, the mastermind behind this amazing blog, uses double sided adhesive tape, rhinestones, and glitter to create these Elsa Eggs.
She created Elsa & Frozen designs using her Cricut Explore Machine and the Disney Frozen Cartridge
to create the intricate pieces of these gorgeous eggs {watch video below}, along with this aquamarine craft paint
& this matching glitter set
.


Now, if you’ve just recently gotten the unending broken record of “Let It Go” to stop playing in your head, I apologize in advance. But, I just couldn’t help but share this Easter craft with you. If you are lucky enough to own a Cricut Cutting Machine {I hear they are amazing} & you just so happen to have a Frozen fan in your family, then you may just make “coolest mom of the year” if you recreate these Frozen Eggs.
But, full disclosure, this may spawn another Frozen Frenzy in your house again. Just sayin’!
Galaxy Eggs
I am simply “over the moon” about these stunning Galaxy inspired Easter eggs by Dream A Little Bigger. When I was a little kid, I was obsessed with space, the stars, the moon, etc. And these Easter eggs look like you’re staring straight into a telescope looking at galaxies far far away.
Allison from Dream A Little Bigger created these Galaxy Eggs by beginning with chalkboard eggs, or plastic eggs that are already black in color, to save time. Or, if you have all the time in the world or tons of patience, you can paint each egg with black paint individually.
She then swirled a variety of acrylic paints in blue & purple hues on the eggs to create “galaxies”, and then sprinkled with white & gold paint to create “stars”.
If have a Star Wars fan or space fanatic in your house, they’ll love making these Galaxy Eggs.
Chalkboard Easter Eggs

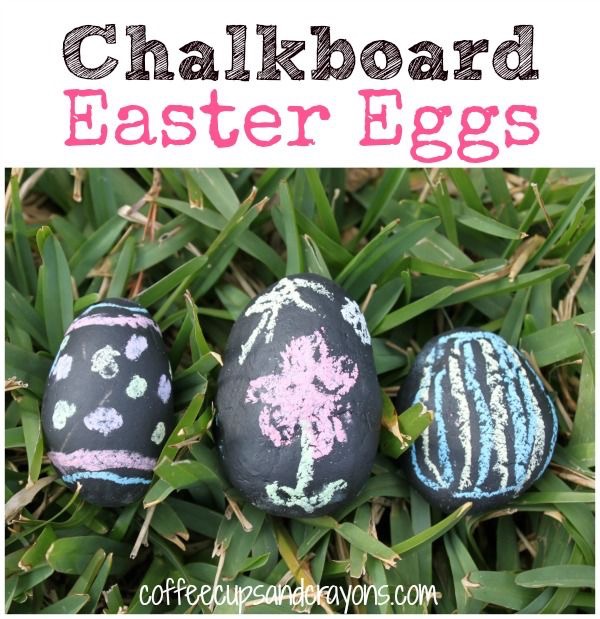
Speaking of chalkboard eggs, why not make you own? Or, you could do what Megan from Coffee Cups & Crayons did, and paint egg-shaped rocks instead.
Use chalkboard paint to coat the eggs or rocks, and then enjoy drawing and decorating with chalk
. And, if you don’t feel like painting, you can purchase chalkboard eggs from Amazon here
.
Kool-Aid Easter Eggs
I’ve seen this trend for a while now, and it’s simple easy and edible….which is extra important when trying to dye Easter eggs with little ones. And, can I just say, who doesn’t love a big pitcher of strawberry Kool Aid on a hot summer day?
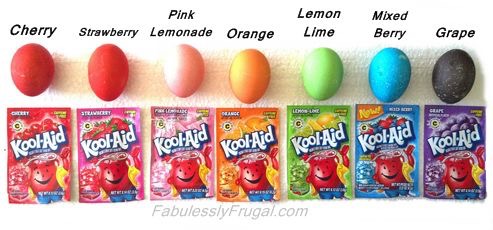
Have you ever thought about dying eggs using Kool Aid ? The photo below by Fabulessly Frugal, shows just how brilliant the colors can be. You simply pour the Kool Aid
packet in 2/3 cup of water, and stir. Place your hard-boiled eggs in unsweetened Kook Aid mixture to dye. How simple is that? And, no vinegar is needed to get these vibrant colors.
Tie Dye Easter Eggs
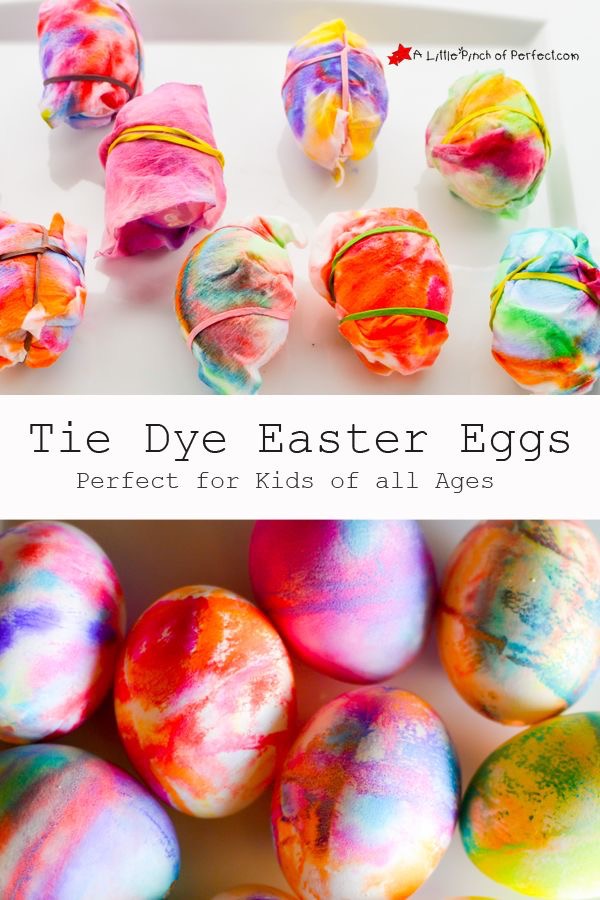
I loved this idea for easy Easter egg decorating from the mom blogger over at A Little Pinch of Perfect…using baby wipes and washable markers
to create Tie Dyed Easter eggs!
You simply cut the baby wipes in half, and use a variety of colorful washable markers
to draw designs on the wipes.
When your littles are finished drawing, simply wrapped hardboiled eggs in the colorful baby wipes and secure with rubber bands. Let sit overnight, or until dry. Unwrap and enjoy!
Gold Foil Easter Eggs
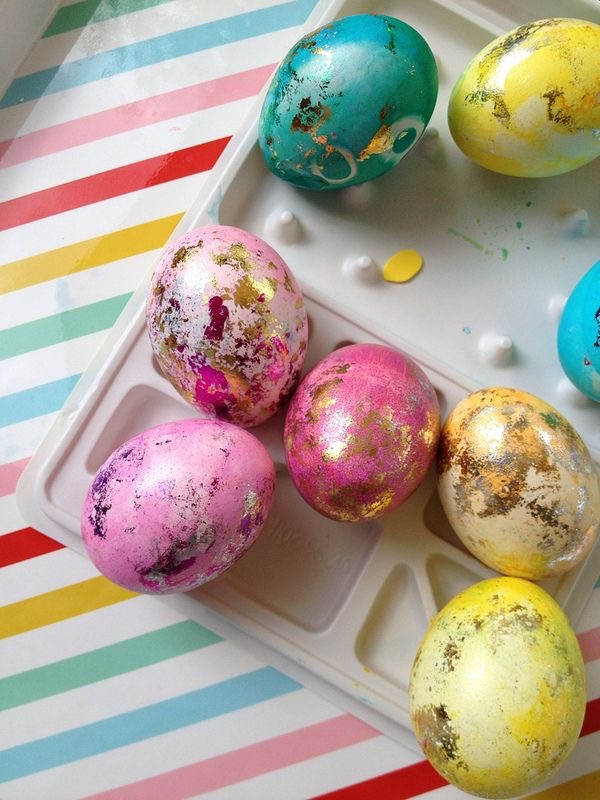
Rachel from Pencil Shavings Studio shared these gorgeous photos of their yearly Easter egg decorating traditions in their home, and I fell in love with these gold foil eggs. We’ve also done this craft with our nieces and nephew, and the eggs turned out beautifully.
You simply dye the Easter eggs using your favorite method, maybe using a new one you’ve seen in this post today. Then, place some craft foil on the egg and press. Here’s a craft foil
in rose gold, how amazing would that look?
Look at these beautiful gold foil eggs Rachel and her son made….
Shaving Cream Marble Eggs
The beautiful Easter eggs made with shaving cream pictured below are courtesy of Katie the “Artsy Mama Bear”. She shares the perfect technique for dying eggs in shaving cream on her blog, Katie’s Crochet Goodies & Crafts.
She suggests combining the shaving cream and food coloring together, and let it sit for 30-45 minutes before dying. Then dip the hardboiled eggs into the colorful shaving cream, and let sit.
This would be quite a sensory activity for little ones. Have you ever tried the shaving cream method before?
What new technique did you discover today that you want to try this Easter? I know I’ve got a list going! See you next time!















22 Comments
I love the glitter eggs and the frozen eggs. So many good ideas!
Thanks for stopping by, Amy! I love the Frozen eggs too! And, I LOVE anything covered in glitter! Happy Easter!
Going to try the shaving cream one this year!!!
Hi, Roseanne! I think we are going to try the Glow-In-The-Dark shaving cream eggs this year! Have fun! Hope you’re boys love them!
Oh my! I want to do every single one that
has gold on it! They’re all so pretty!
Awww, Christina, you’re a woman after my own heart! I too love anything gold, particularly rose gold! Happy Easter! Thanks for stopping by!
What a great roundup! I think my favorite are the watercolor ones!
I love the watercolor eggs too! I just may have to try those as well. Happy Easter! Thanks for stopping by!
My kids will love this love the Kool aid one! Pinning for Easter!
The Kool Aid eggs are really cool…and edible! Let us know how they turn out! Happy Easter!
Ok these are seriously gorgeous! I’m trying all of them.
Thanks, Courtney! Glad you enjoyed this post! See you again soon!
It’s so hard to choose! My kids love to eat the eggs, so we try to keep them non-toxic and edible. I have a friend who did the shaving cream eggs, but it’s not edible afterward, so the next year, she changed it to Cool-Whip. Completely edible, and she got the same effect! I’ve been wanting to try the Kool Aid ones, but never seem to remember it until AFTER Easter. These are all just too pretty!! Great round up!
Thanks, Michelle! And…that’s an awesome tip to use Cool-Whip instead of shaving cream! That’s a great idea! Hope you and your kiddo’s have fun decorating Easter eggs this year! Happy Easter!
Okay. I am absolutely in SHOCK AND AWE at these ideas!! MUST TRY THEM ALLLLLLL!
Thanks so much, Rachel! Glad you enjoyed this post. I know it got me in the Easter mood! Happy Easter! Thanks for stopping by!
OMG! You’re like the Easter godmother or something! You have such great ideas!! I loved it! Super creative! Now I just need to organize my time in order to try out all the Easter egg ideas! Thanks for sharing!!! 🙂
Ha! Andrea, you’re hilarious! This comment made my day! I’m so happy you loved this post. Thanks for stopping by and I hope you and your family have a Happy Easter!
WOW these eggs are incredible! I don’t have any kids or younger people in my life, but these eggs are so beautiful it makes me want to decorate just for myself.
I hear ya, Sarah! I’m thinking I may just boil up a dozen and decorate them by myself. Sometimes it’s more fun that way! Thanks for stopping by! Happy Easter! And, happy decorating!
These Eggs are really amazing.I didnt know you can decorate many designs with eggs!You can consider selling it at a flea market or something =)
Awesome !! Definitely need to try some of these